Label Management
Labels are important tools for managing Issues and Pull Requests, allowing you to quickly categorize, filter, and track issues. This article will provide a detailed guide on how to create, edit, and delete labels within a project.
Management Entry
-
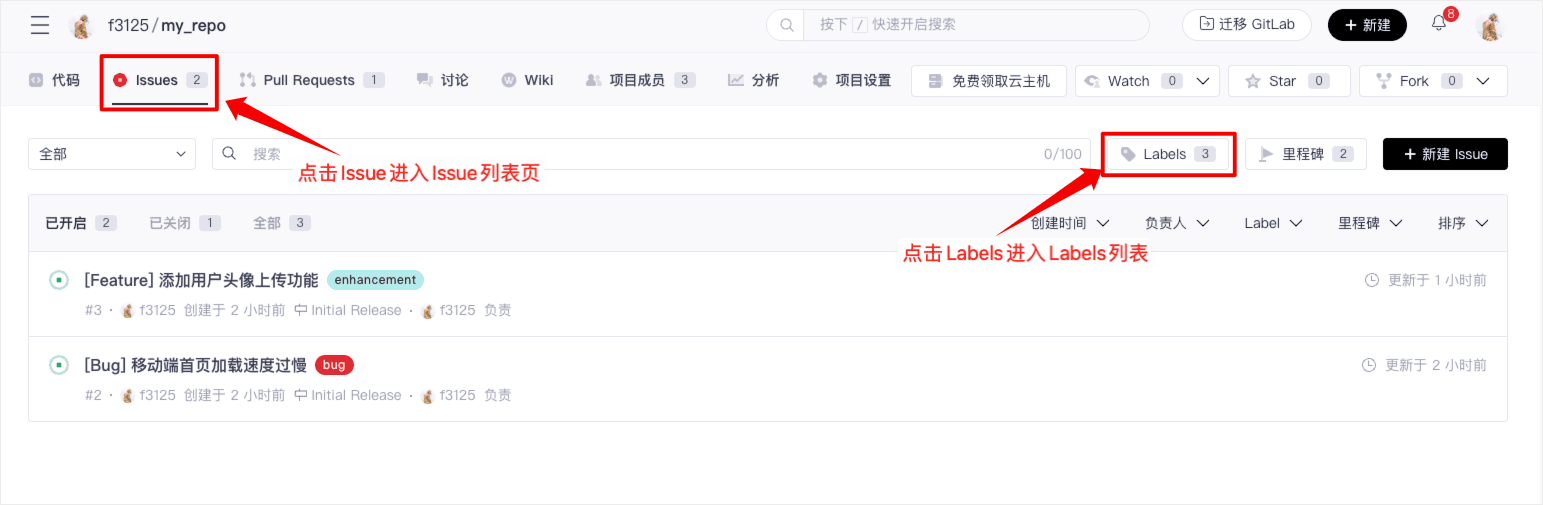
Enter the project homepage, click on "Issues" in the label bar to go to the Issue list, then click "Labels" to enter the Labels management list.
-
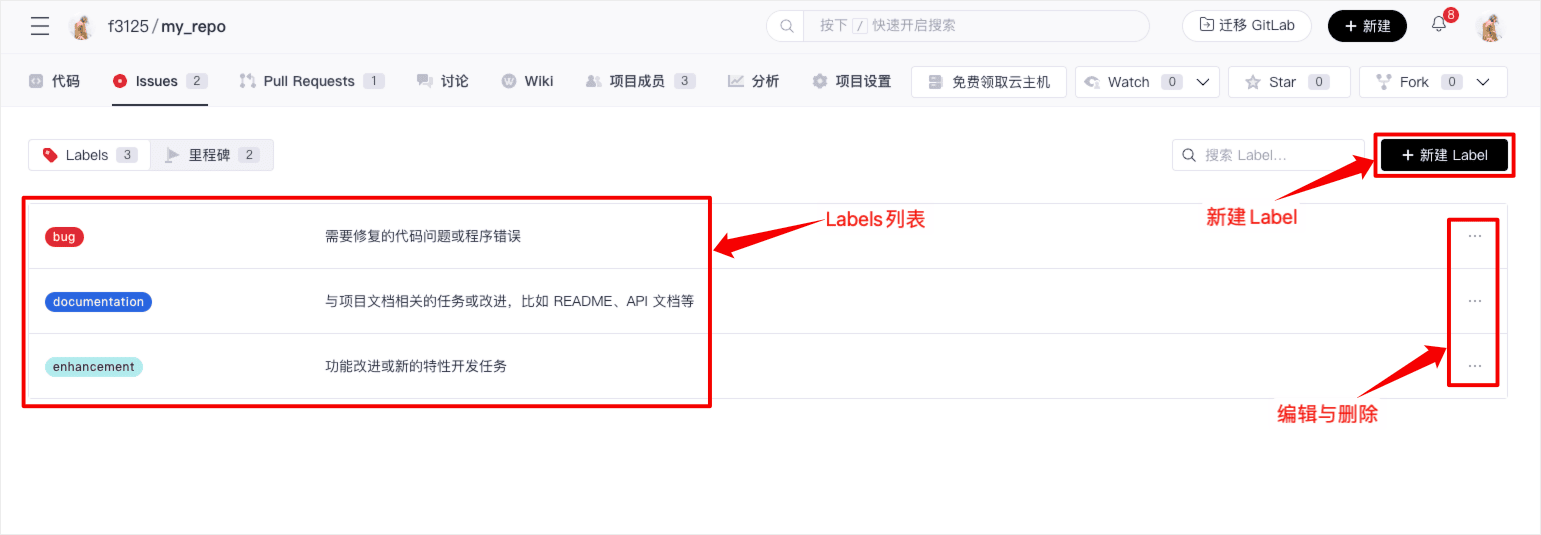
In the Labels list, you can create, edit, and delete labels.
Creating a Label
-
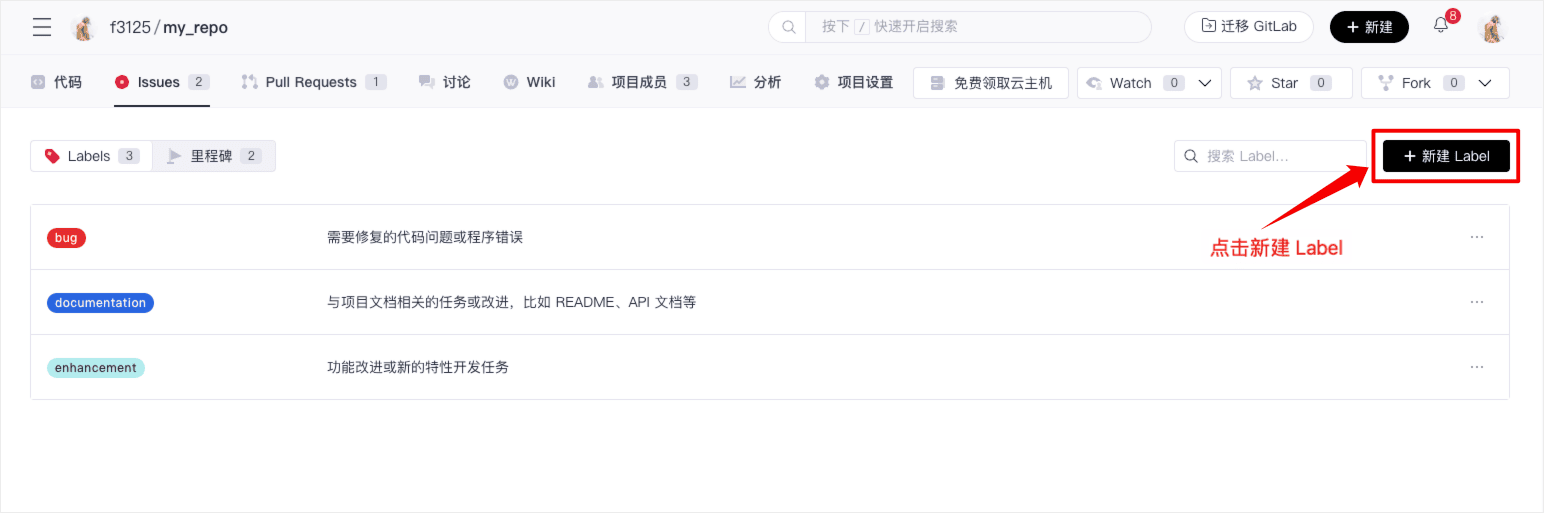
In the Label list, click "+ New Label" to enter the new label page.
-
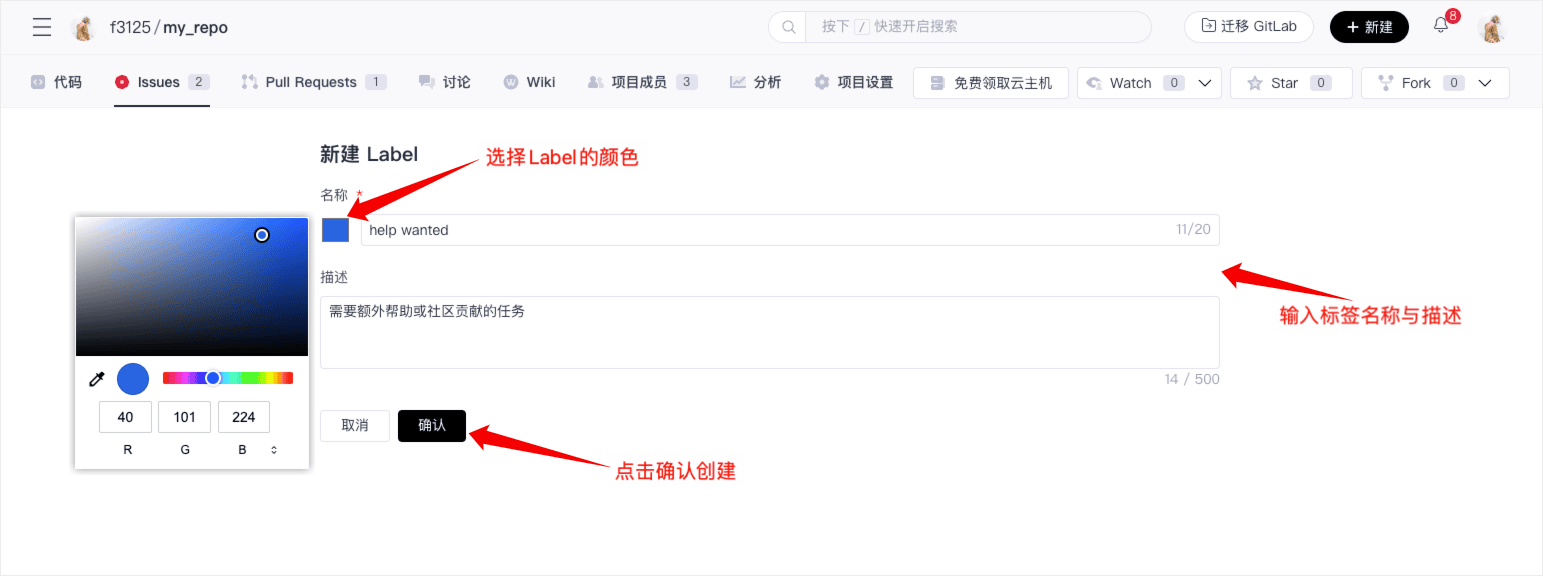
Enter the name and description of the label, choose a corresponding color to help other users distinguish it, and click confirm to complete the creation.
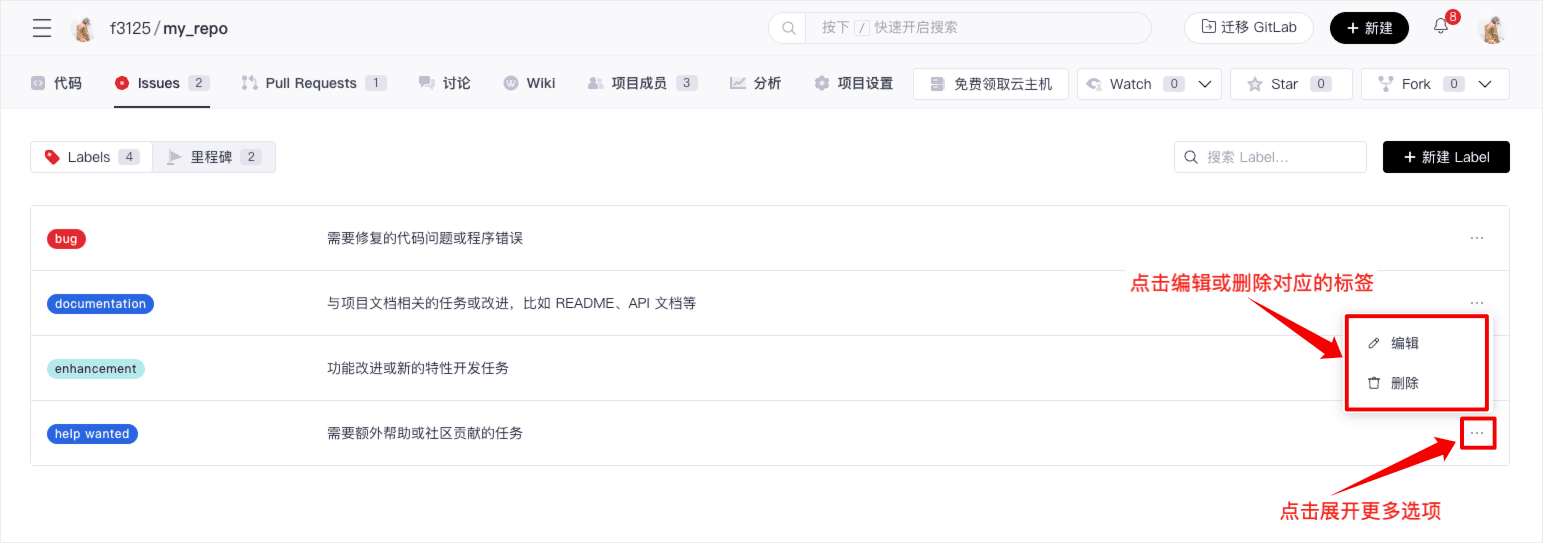
Editing and Deleting a Label
Go to the Label list page, select the corresponding Label, click on the "more" icon on the right to expand the editing and deletion options, and perform the desired action.
Through the label management feature, you can more conveniently organize and categorize Issues and Pull Requests within your project, enhancing team collaboration efficiency.