使用WebHook
Webhook 将允许 GitCode 向你的外部服务进行通知,当某些特定事件发生时,我们将向你指定的 URL中发送一个 POST 请求。这种机制可以用于集成和自动化工作流,例如持续集成、消息通知、和第三方服务对接。s
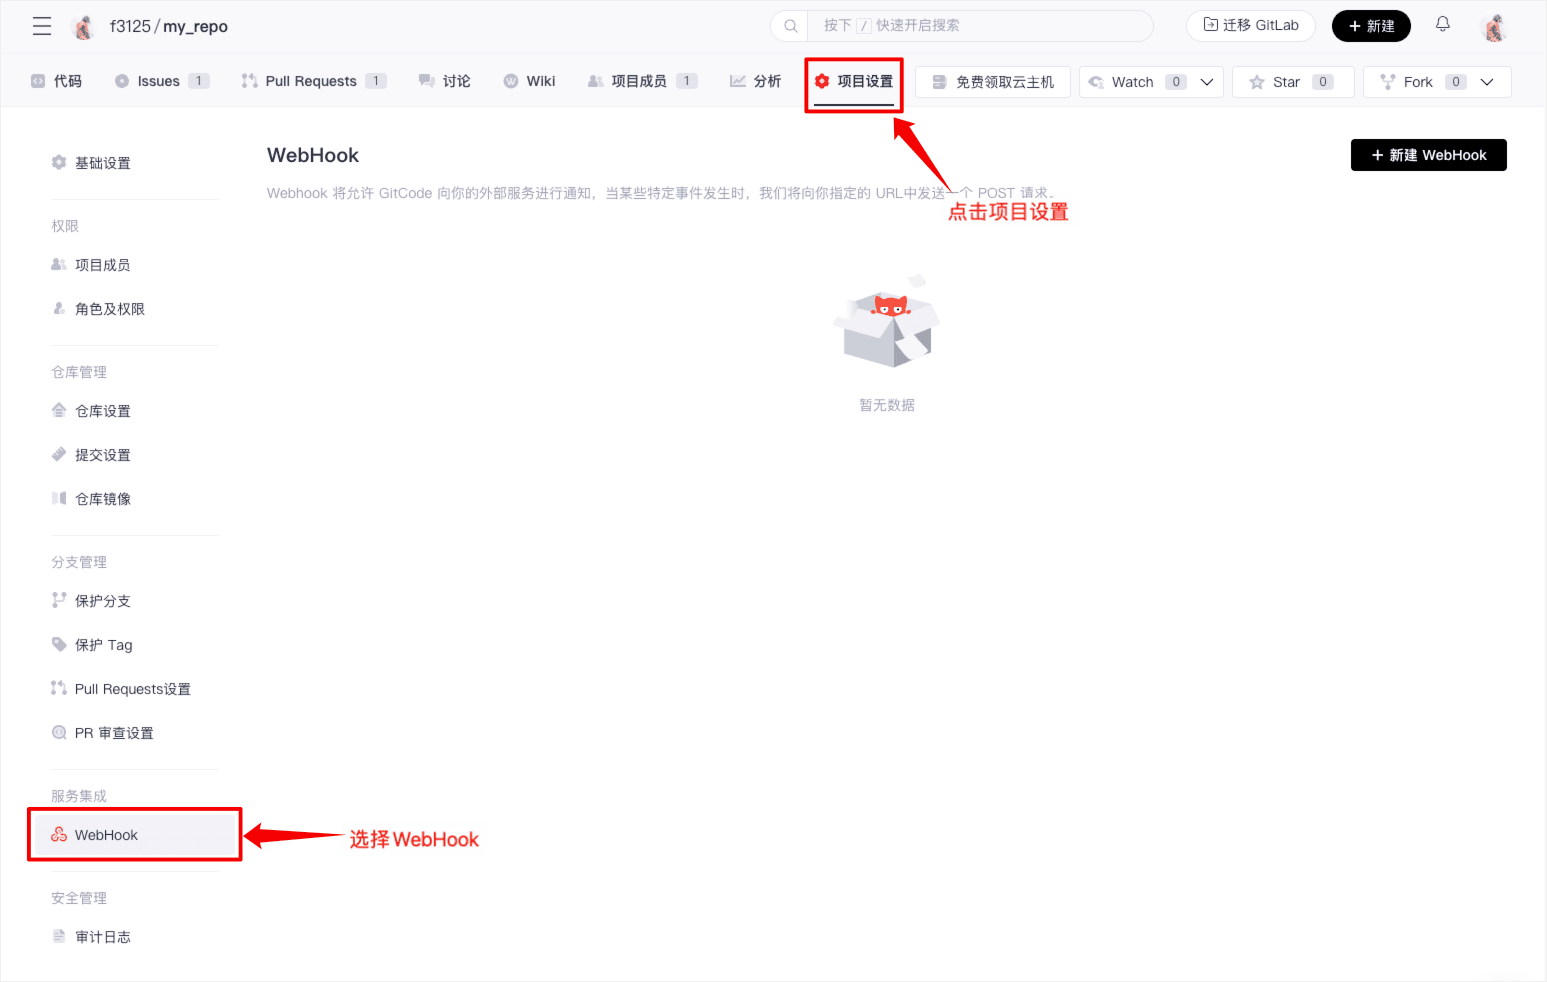
设置入口
ß首先进入项目主页,点击标签栏中的「项目设置」,再点击侧边栏中的「WebHook」进入到 WebHook 设置页面。
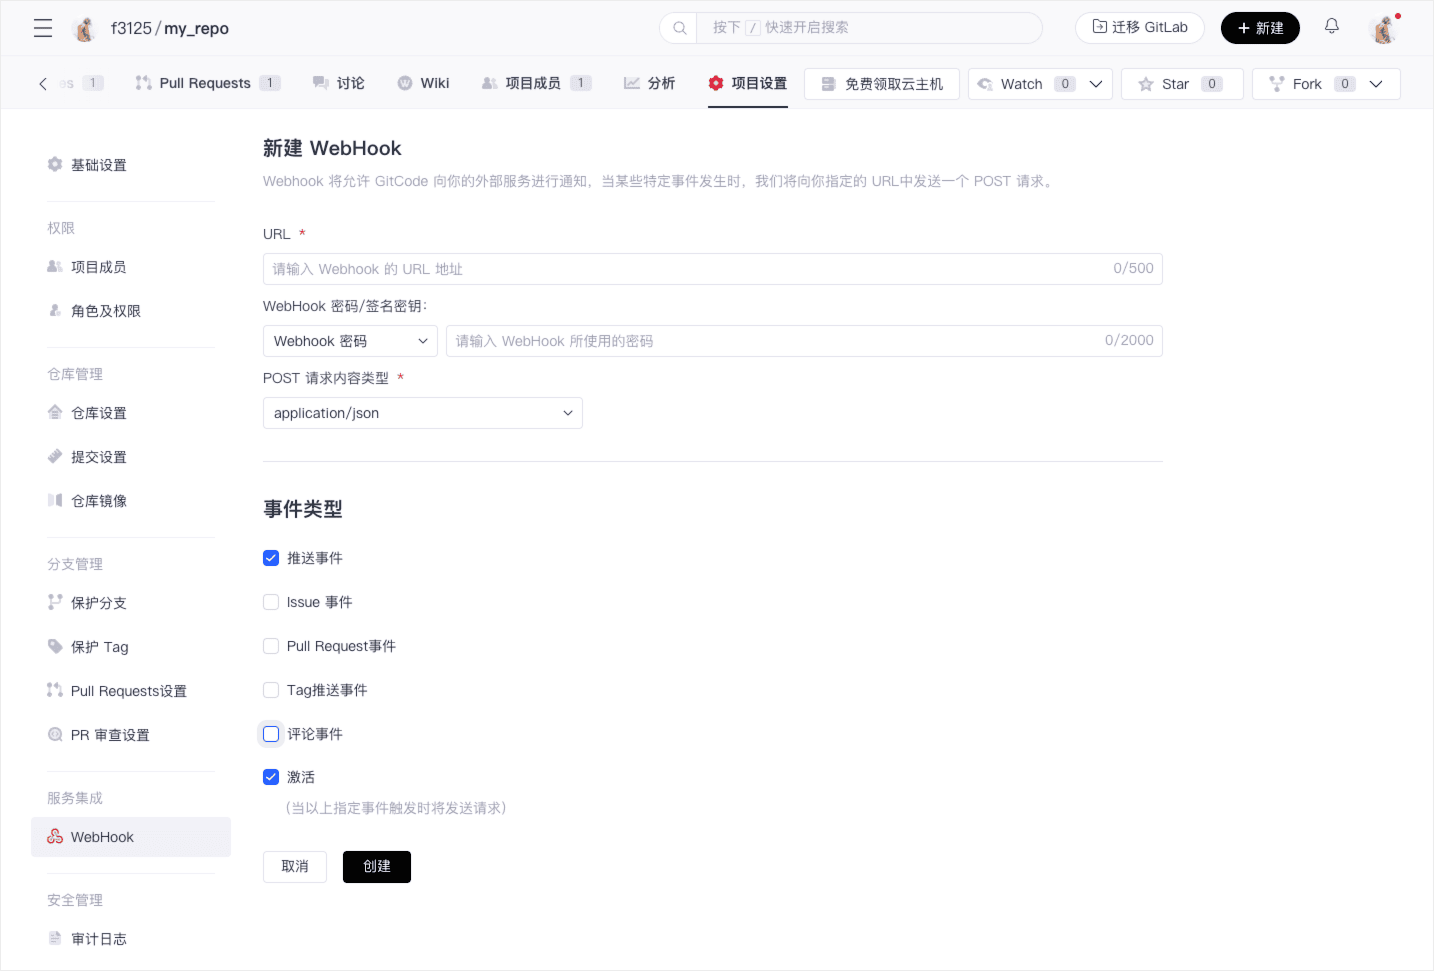
新建 WebHook
-
点击「+ 新建 WebHook」,再填写相关的内容:URL、WebHook 密码/签名密钥、POST 请求内容类型、事件类型。
-
URL:事件发生时 GitCode 将向此处指定的 URL 发送 Post 请求
-
WebHook 密码/签名密钥:
- WebHook 密码是一个简单的字符串,用来为 Webhook 提供基本的身份验证。GitCode 会在发送 Webhook 请求时将该密码包含在请求头(X-GitCode-Token:密码),接收端可以通过验证这个密码来确认请求的合法性。
- 签名密钥是一种更安全的验证方式,基于加密算法生成请求签名。GitCode 会使用配置的密钥对请求内容进行加密,并在请求头中附带签名(X-GitCode-Signature-256:sha256=签名)。接收端可以使用同样的密钥和算法计算签名并进行比对,从而确认请求的完整性和来源合法性。
-
事件类型:选中的事件发生时,GitCode 会自动发送 Post 请求。
-
-
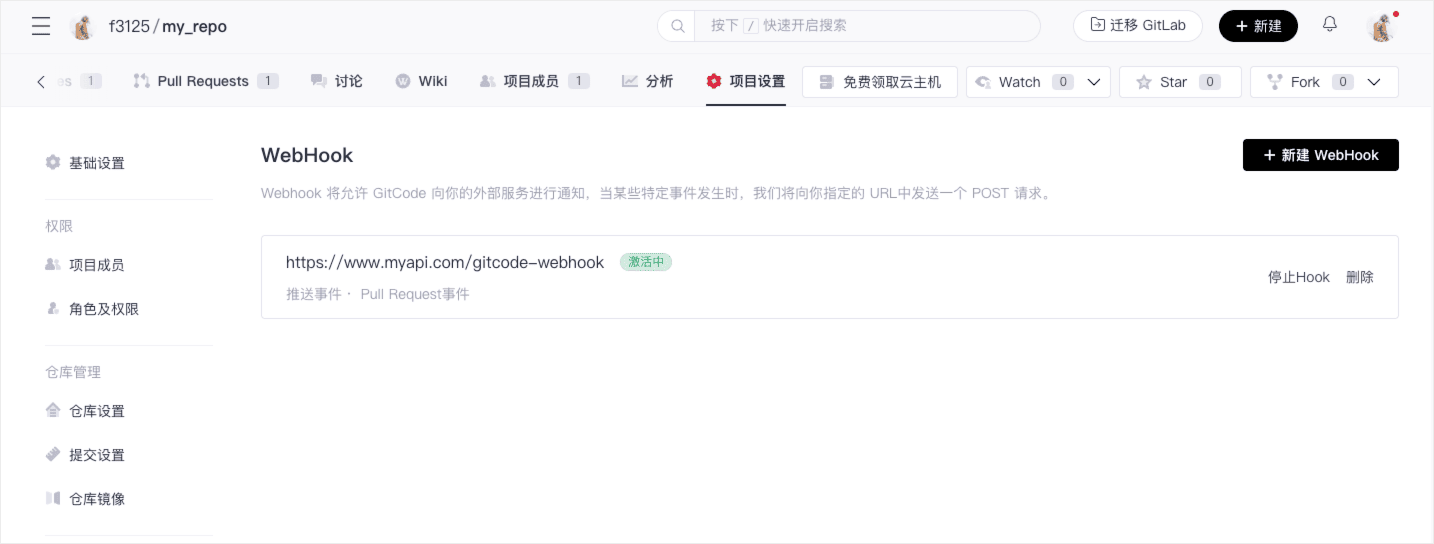
创建成功后可在设置页面看到已有的 WebHook 列表
-
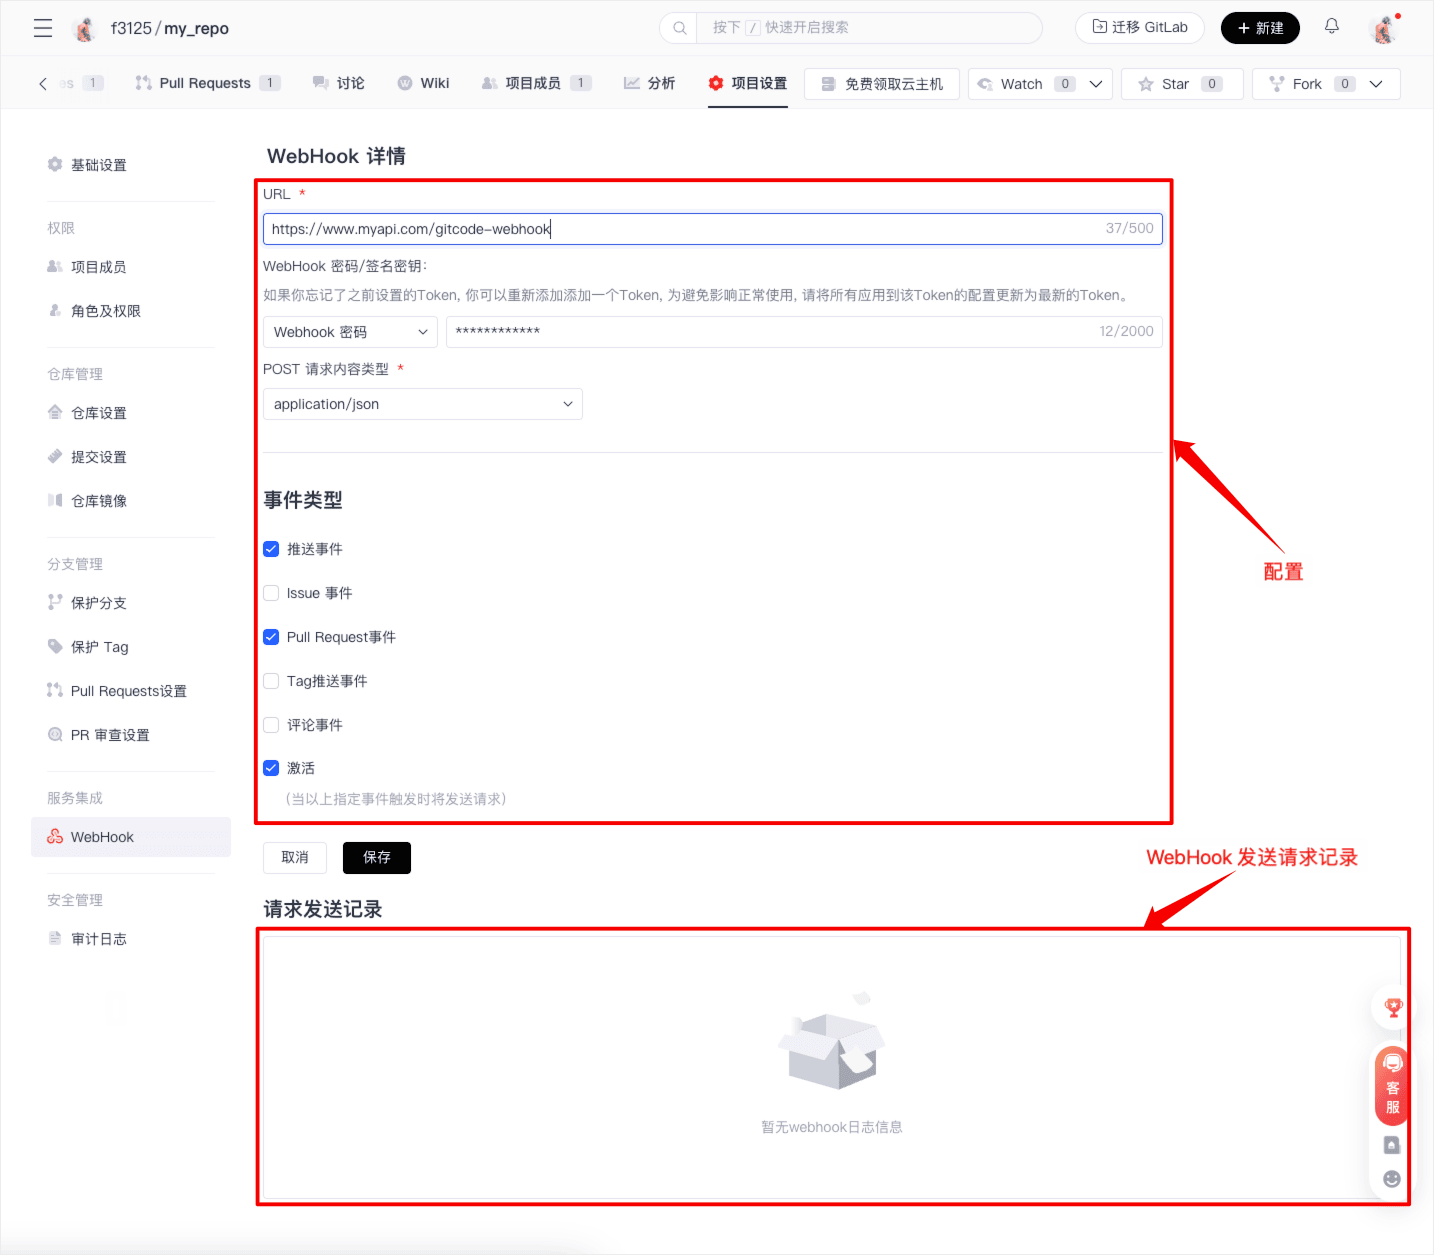
点击某个 WebHook 进入 WebHook 详情页面,可在此对 WebHook 再次配置,也可在此查看请求发送记录
激活、停止与删除
在设置页面,您可以激活或停止 WebHook,也可以删除指定 WebHook。

利用 Webhook 功能,与 GitCode 建立流畅的事件驱动工作流。