Getting Started
The board is a powerful project management tool provided by GitCode, helping teams efficiently organize, track, and collaborate on project progress. This guide will help you quickly master the core features of the board, from creation to daily usage.
Before using the board feature, please ensure:
- You have created or joined an organization
- A project has been created within the organization
- You have the appropriate permissions
For more details, please refer to the New Organization documentation.
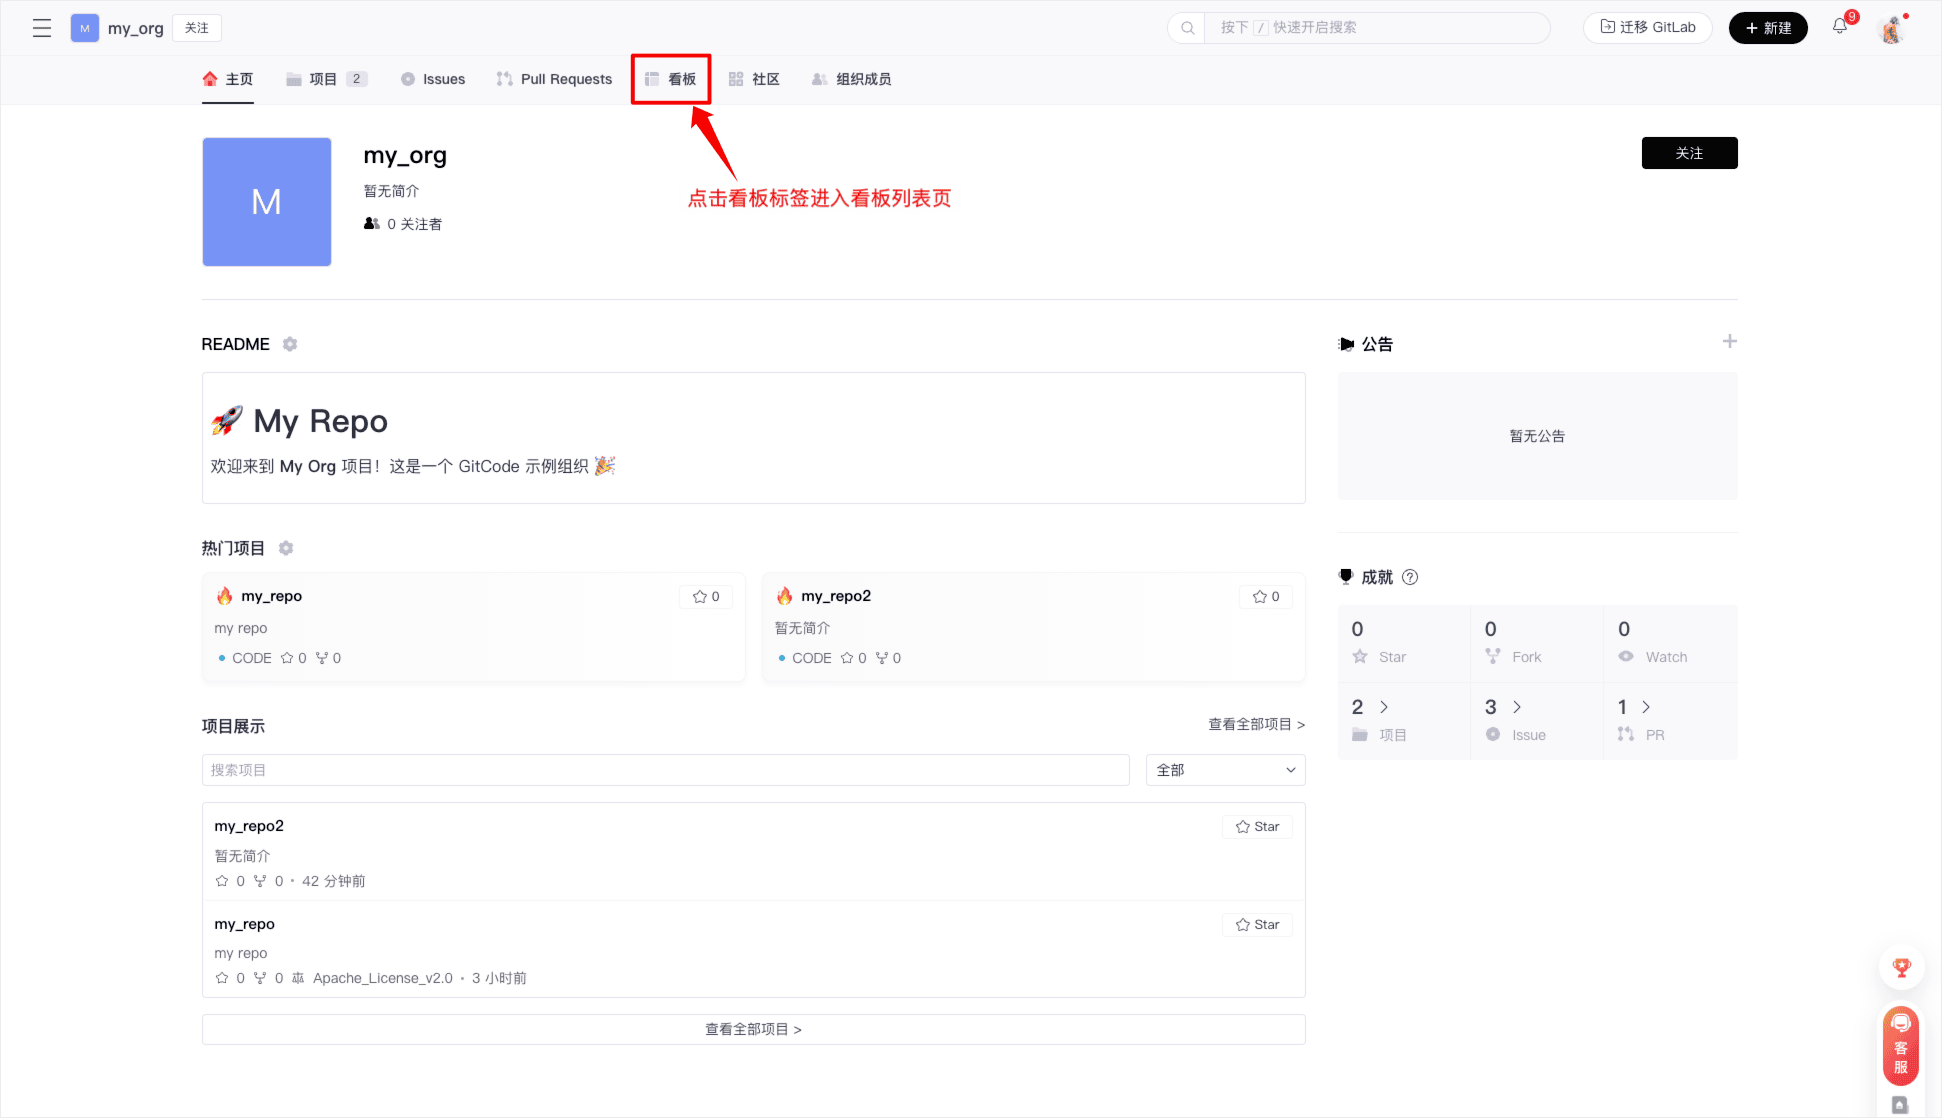
1. Create a Board
-
Navigate to the organization homepage, click on the "Board" tab in the top navigation bar to enter the board list page
-
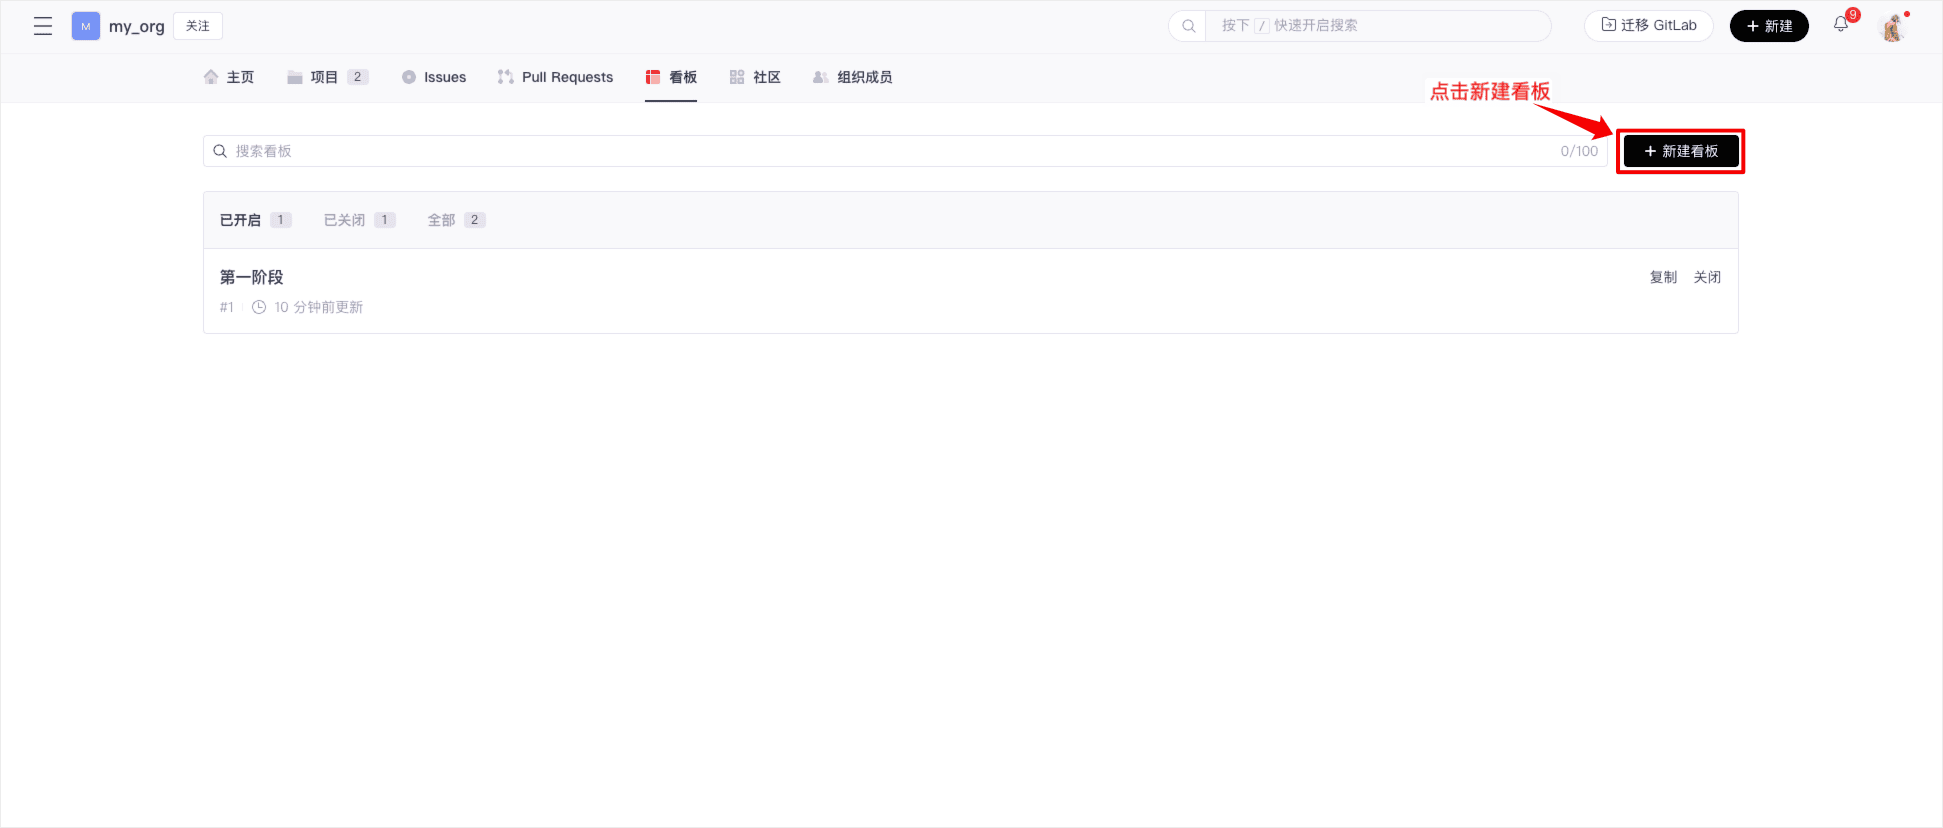
Click the "New Board" button, the system will automatically create a board with a default template
-
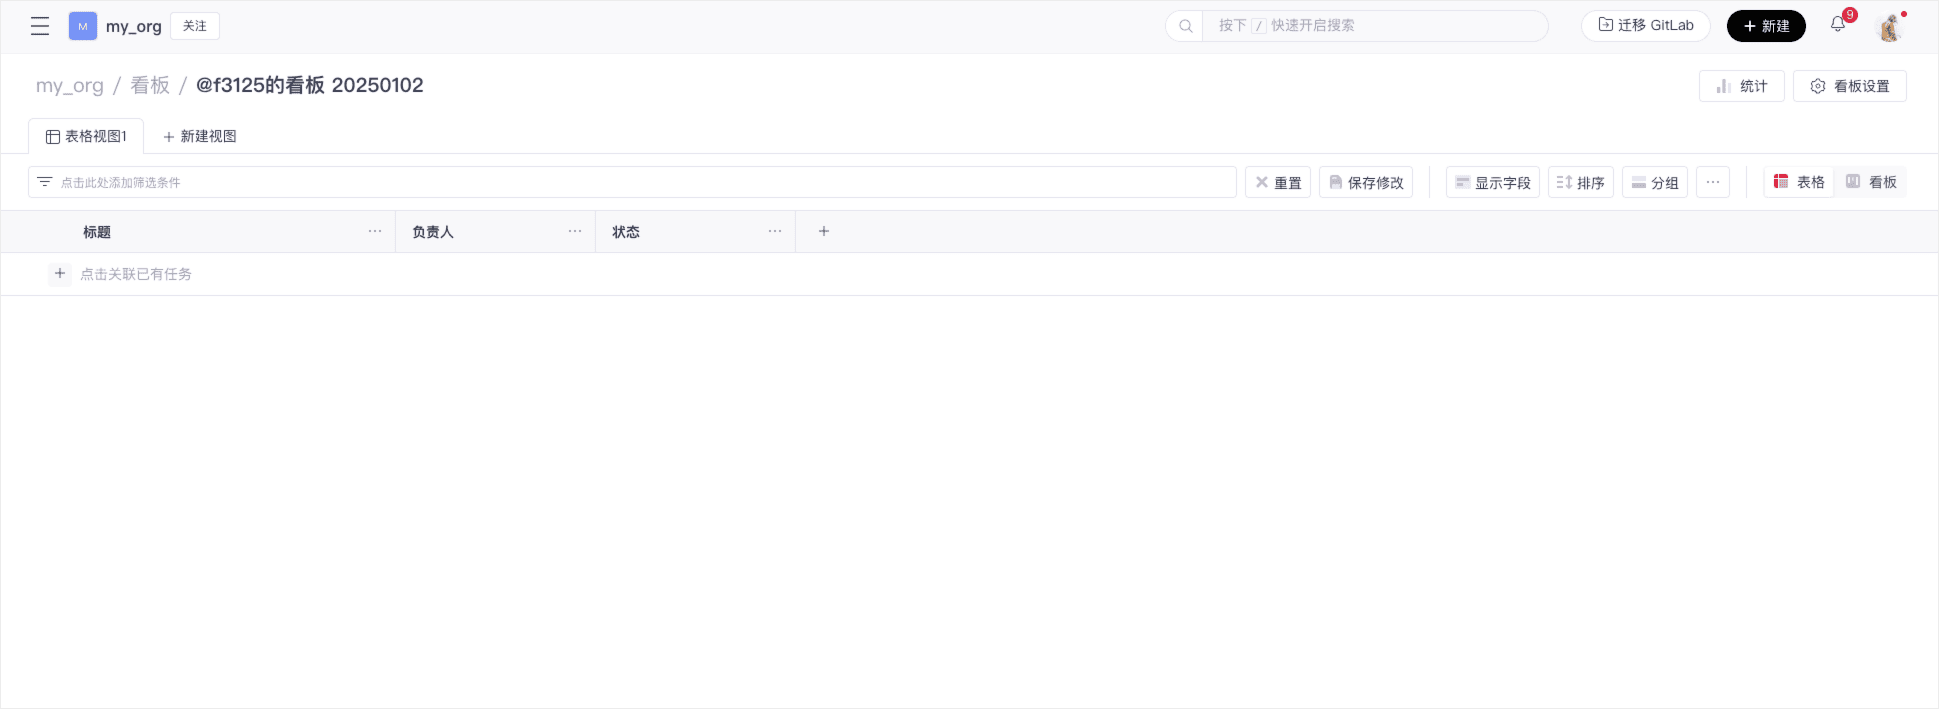
A new board has been successfully created
Limitations
Currently, the board only supports up to 1200 rows (1200 tasks) and 50 columns (including system fields).
When creating a board, it will include the following system fields by default:
- Title, Title
- Assignees, Assignee
- Labels, Labels
- Linked pull request, Linked PR
- Reviewers PR, Reviewer
- Repository, Repository
- Milestone, Milestone
2. Set Up the Board
-
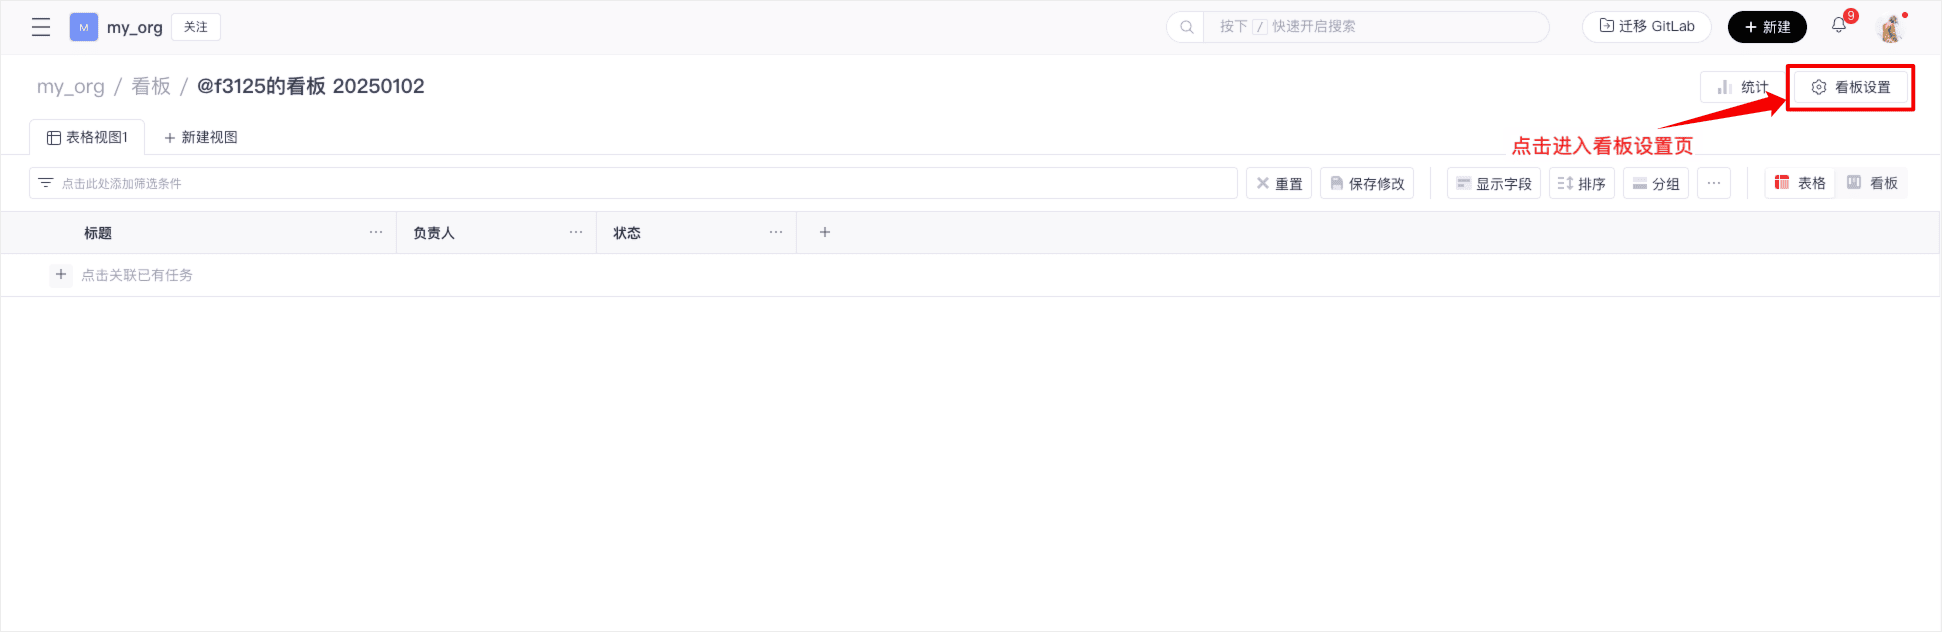
You can perform some custom settings for the board, click on the "Board Settings" at the top right corner to enter the board settings page
-
On the settings page, fill in: Board name (required), Description (optional), Visibility (public/private), and click "Update Settings" to complete the basic configuration
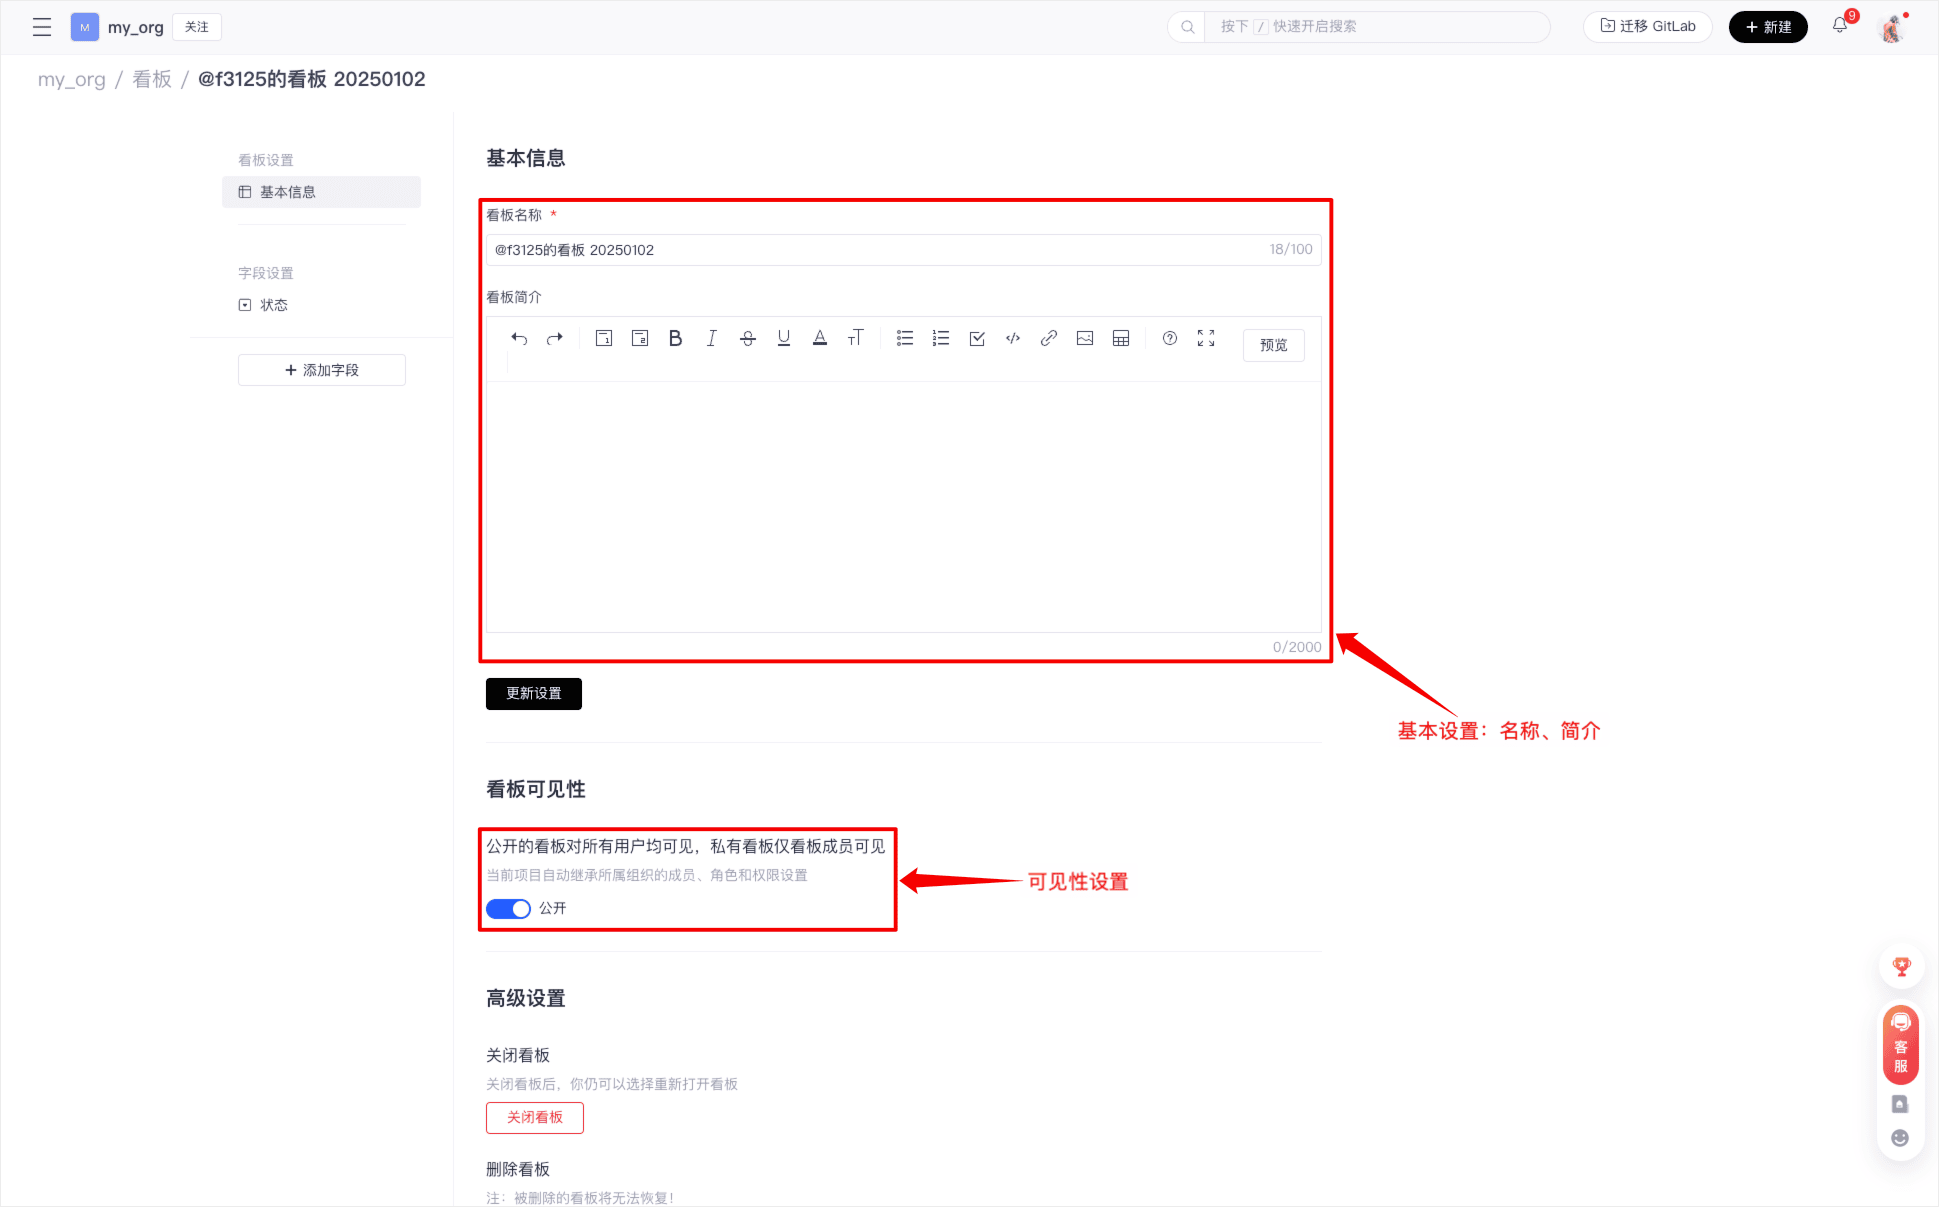
-
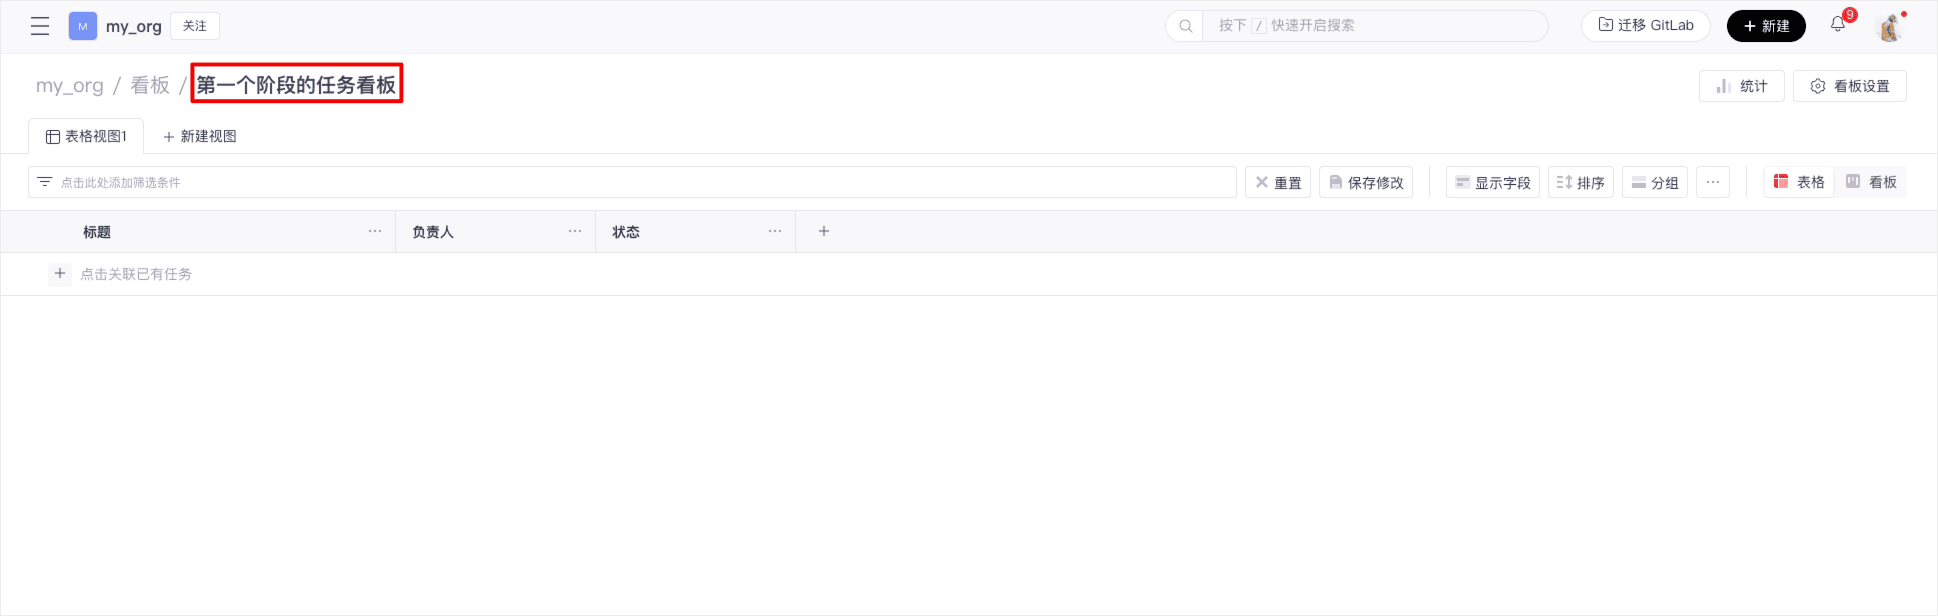
Return to the board page to see the updated board name
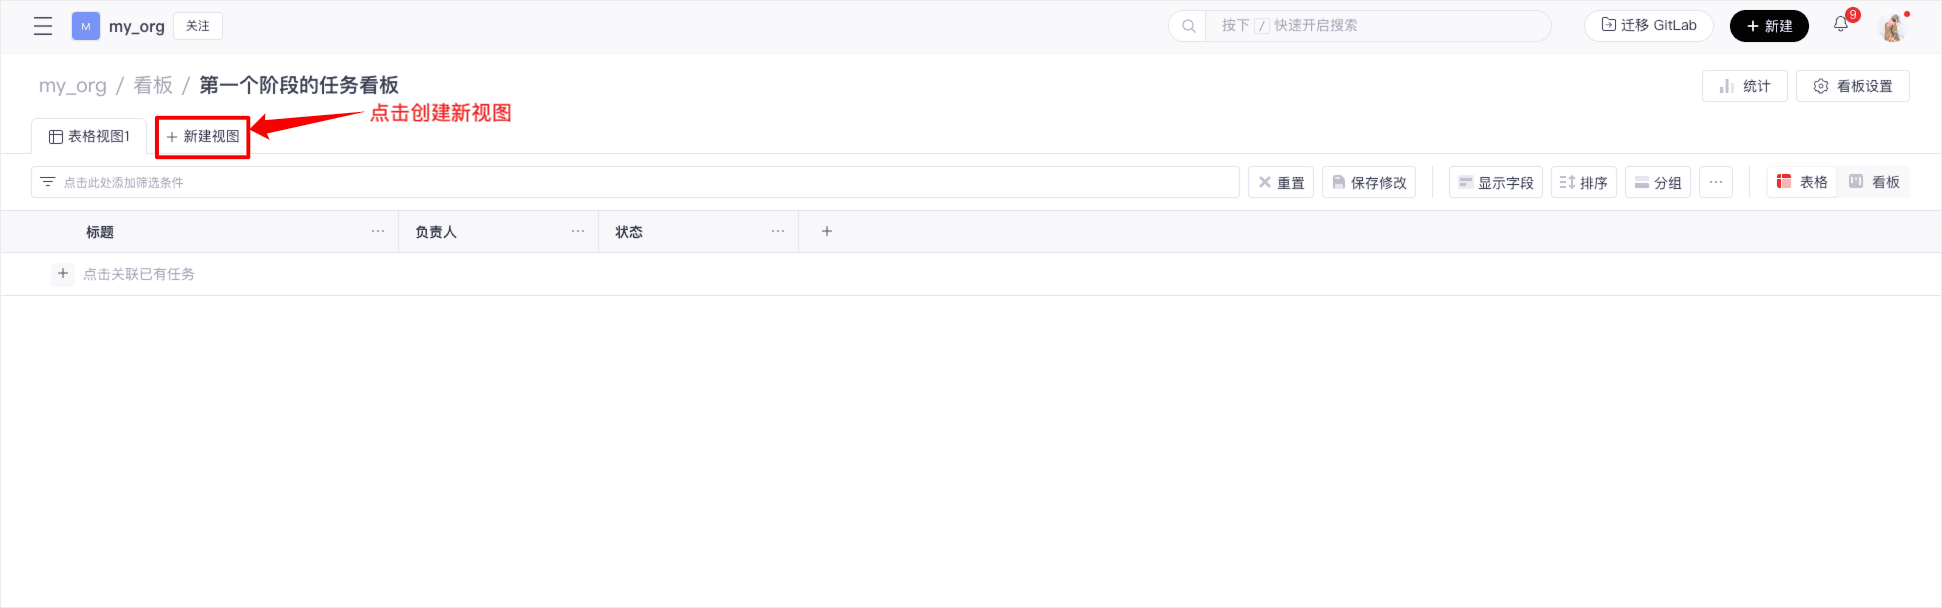
3. Create a View
-
On the board page, click "New View" to create a new default view
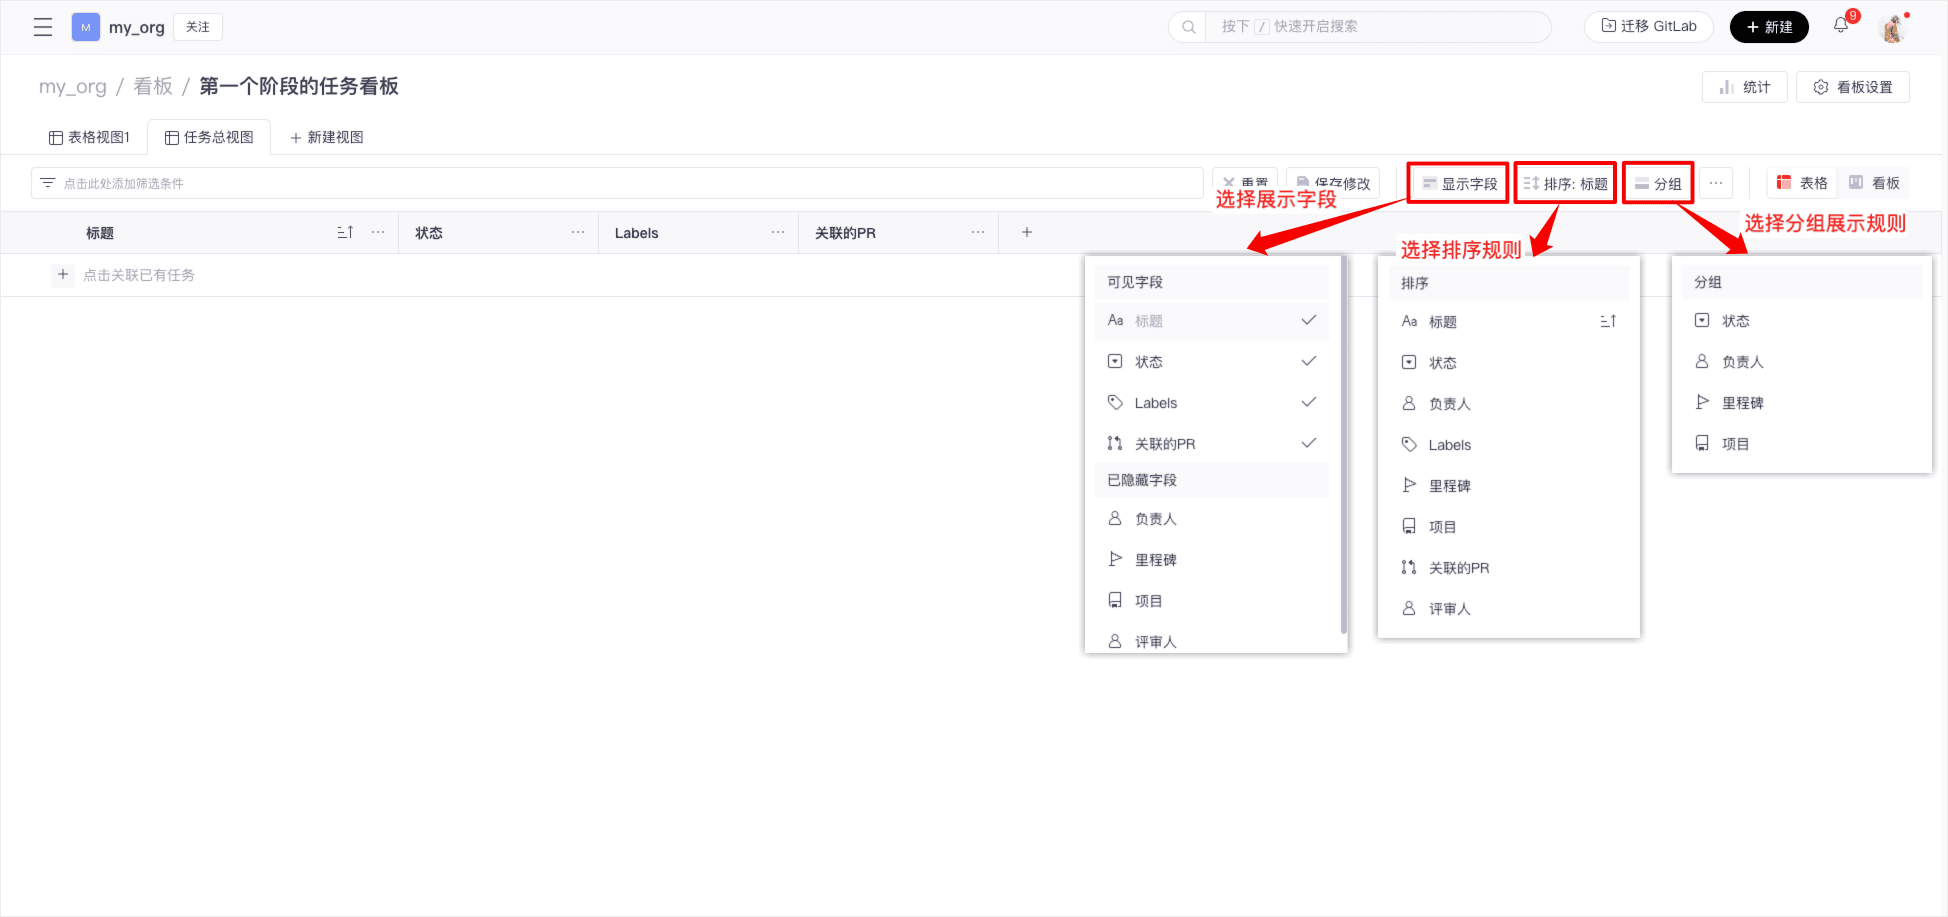
-
Expand the "More" options of the view, you can rename, delete, and export data of the view

-
The buttons "Show Fields", "Sort", and "Group" are used to configure the fields displayed in the view, the sorting rules for tasks, and the grouping rules for tasks. After configuration, click "Save Changes" to persist the settings
4. Customize Fields
-
In the board settings, click "Add Field" to open the "Custom Field Settings" page, enter the field name, and select the field type
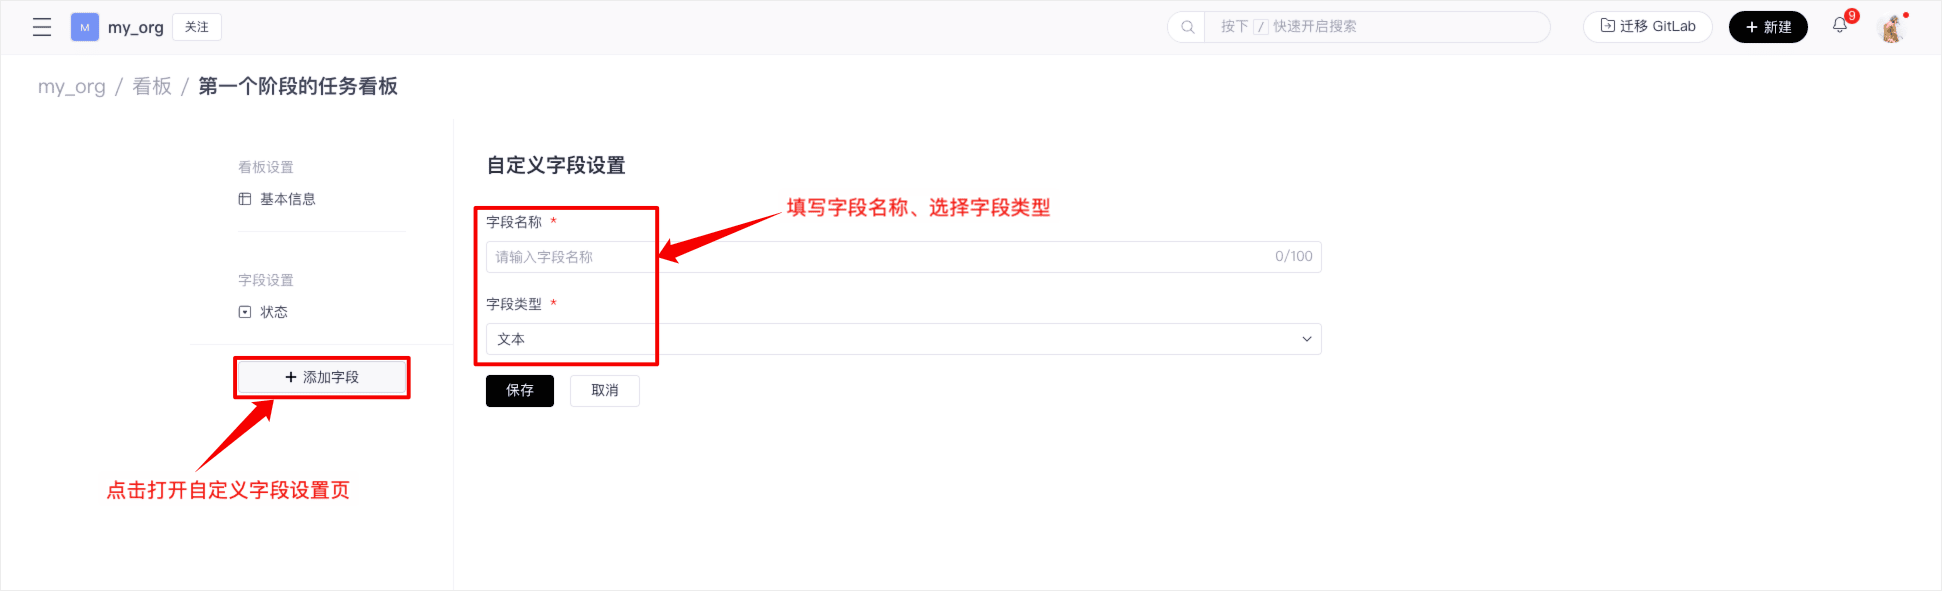
There are four types of fields, here are examples of creating four types of fields


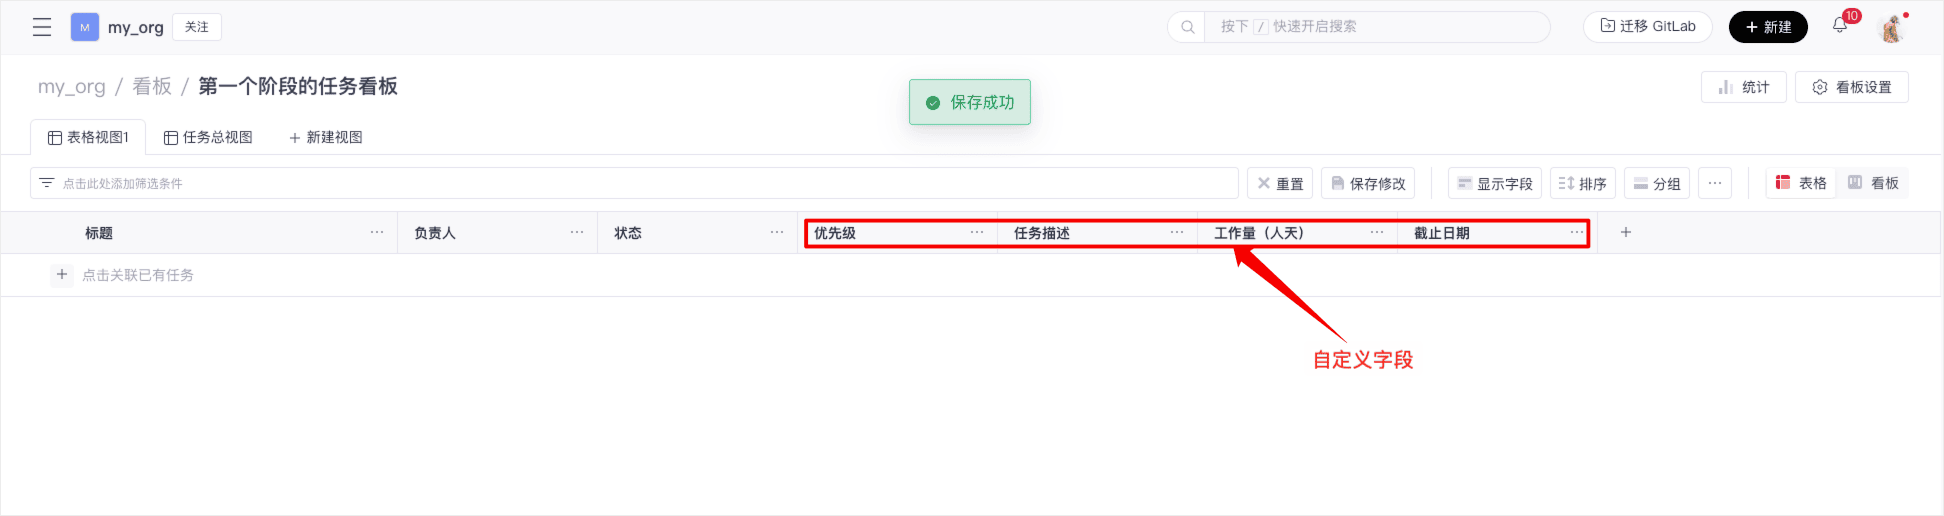
-
After configuring the display fields on the view page, you can see the following effect
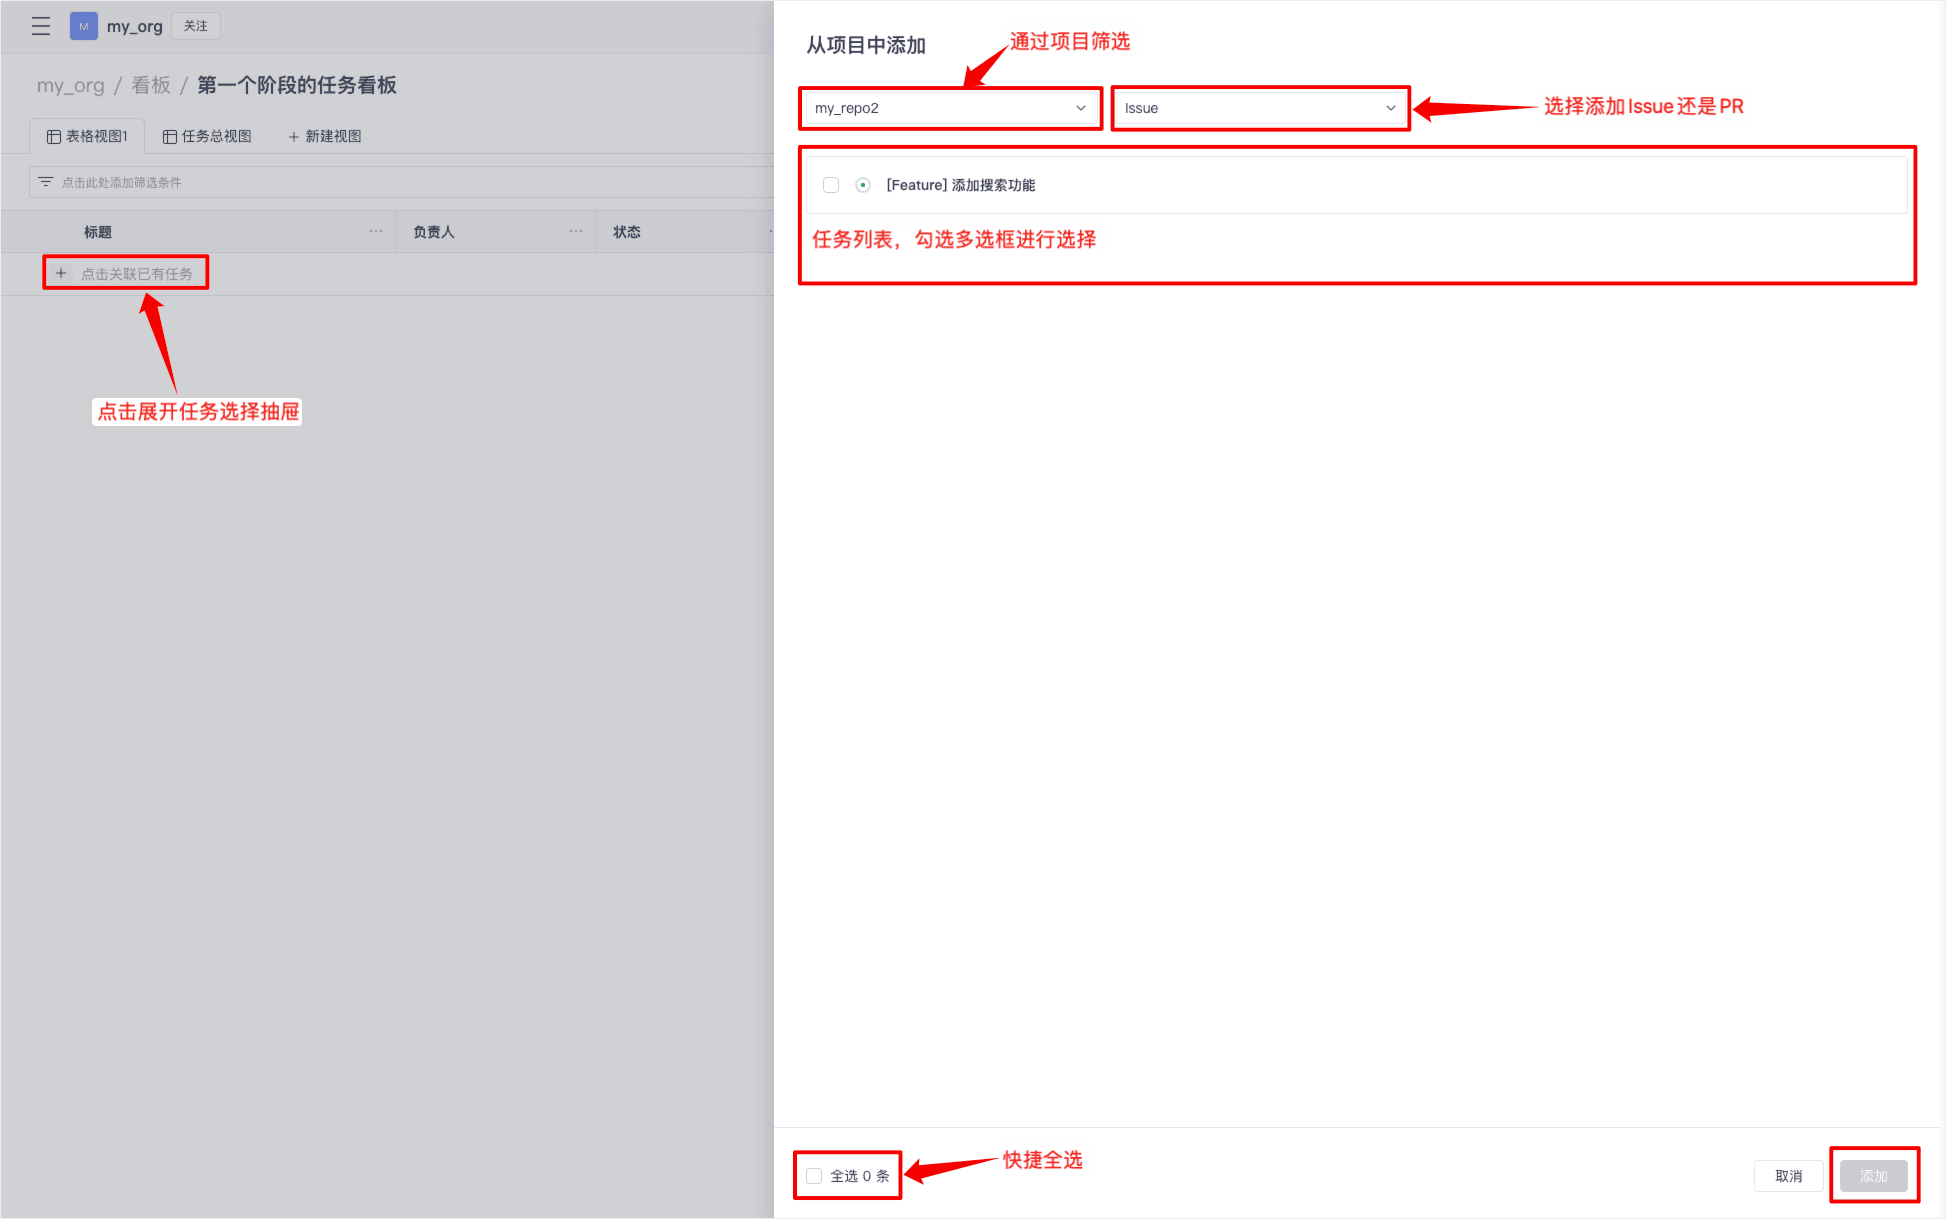
5. Link Tasks
Currently, the board only supports up to 1200 rows (1200 tasks), 50 columns (including system fields)
-
On the view page, click the "Click to link existing tasks" button to expand the task selection drawer. You can filter by project, select Issues and PRs, and click Add to complete the linking operation
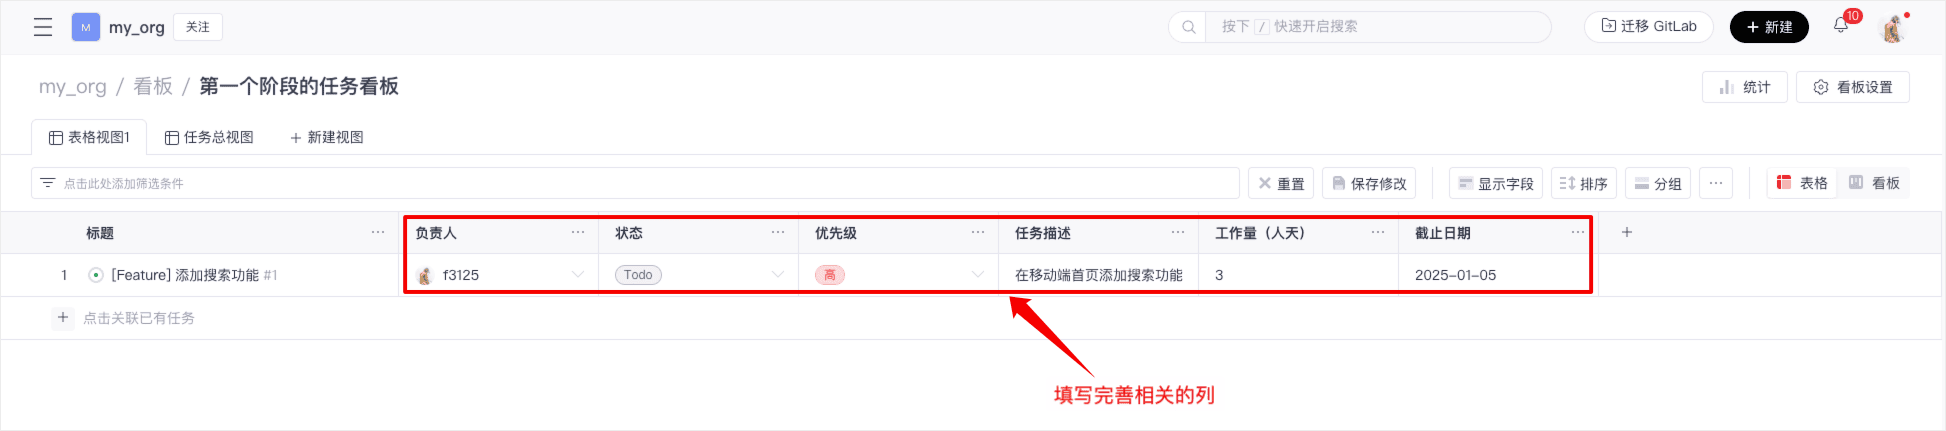
-
Return to the view page, the tasks have been linked to the board, fill in the relevant columns
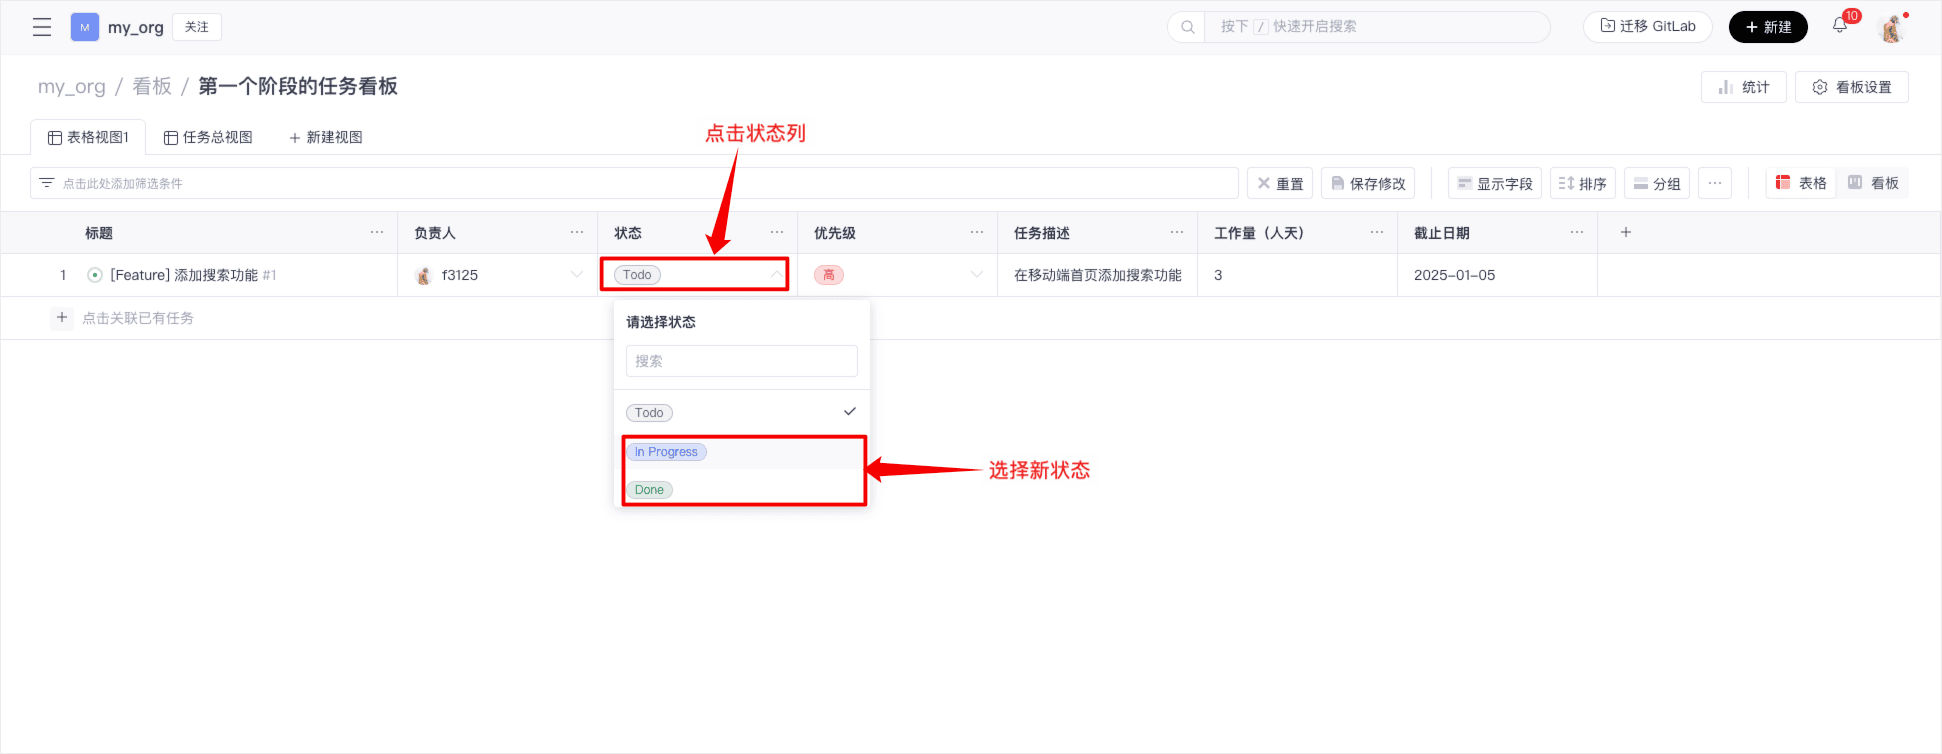
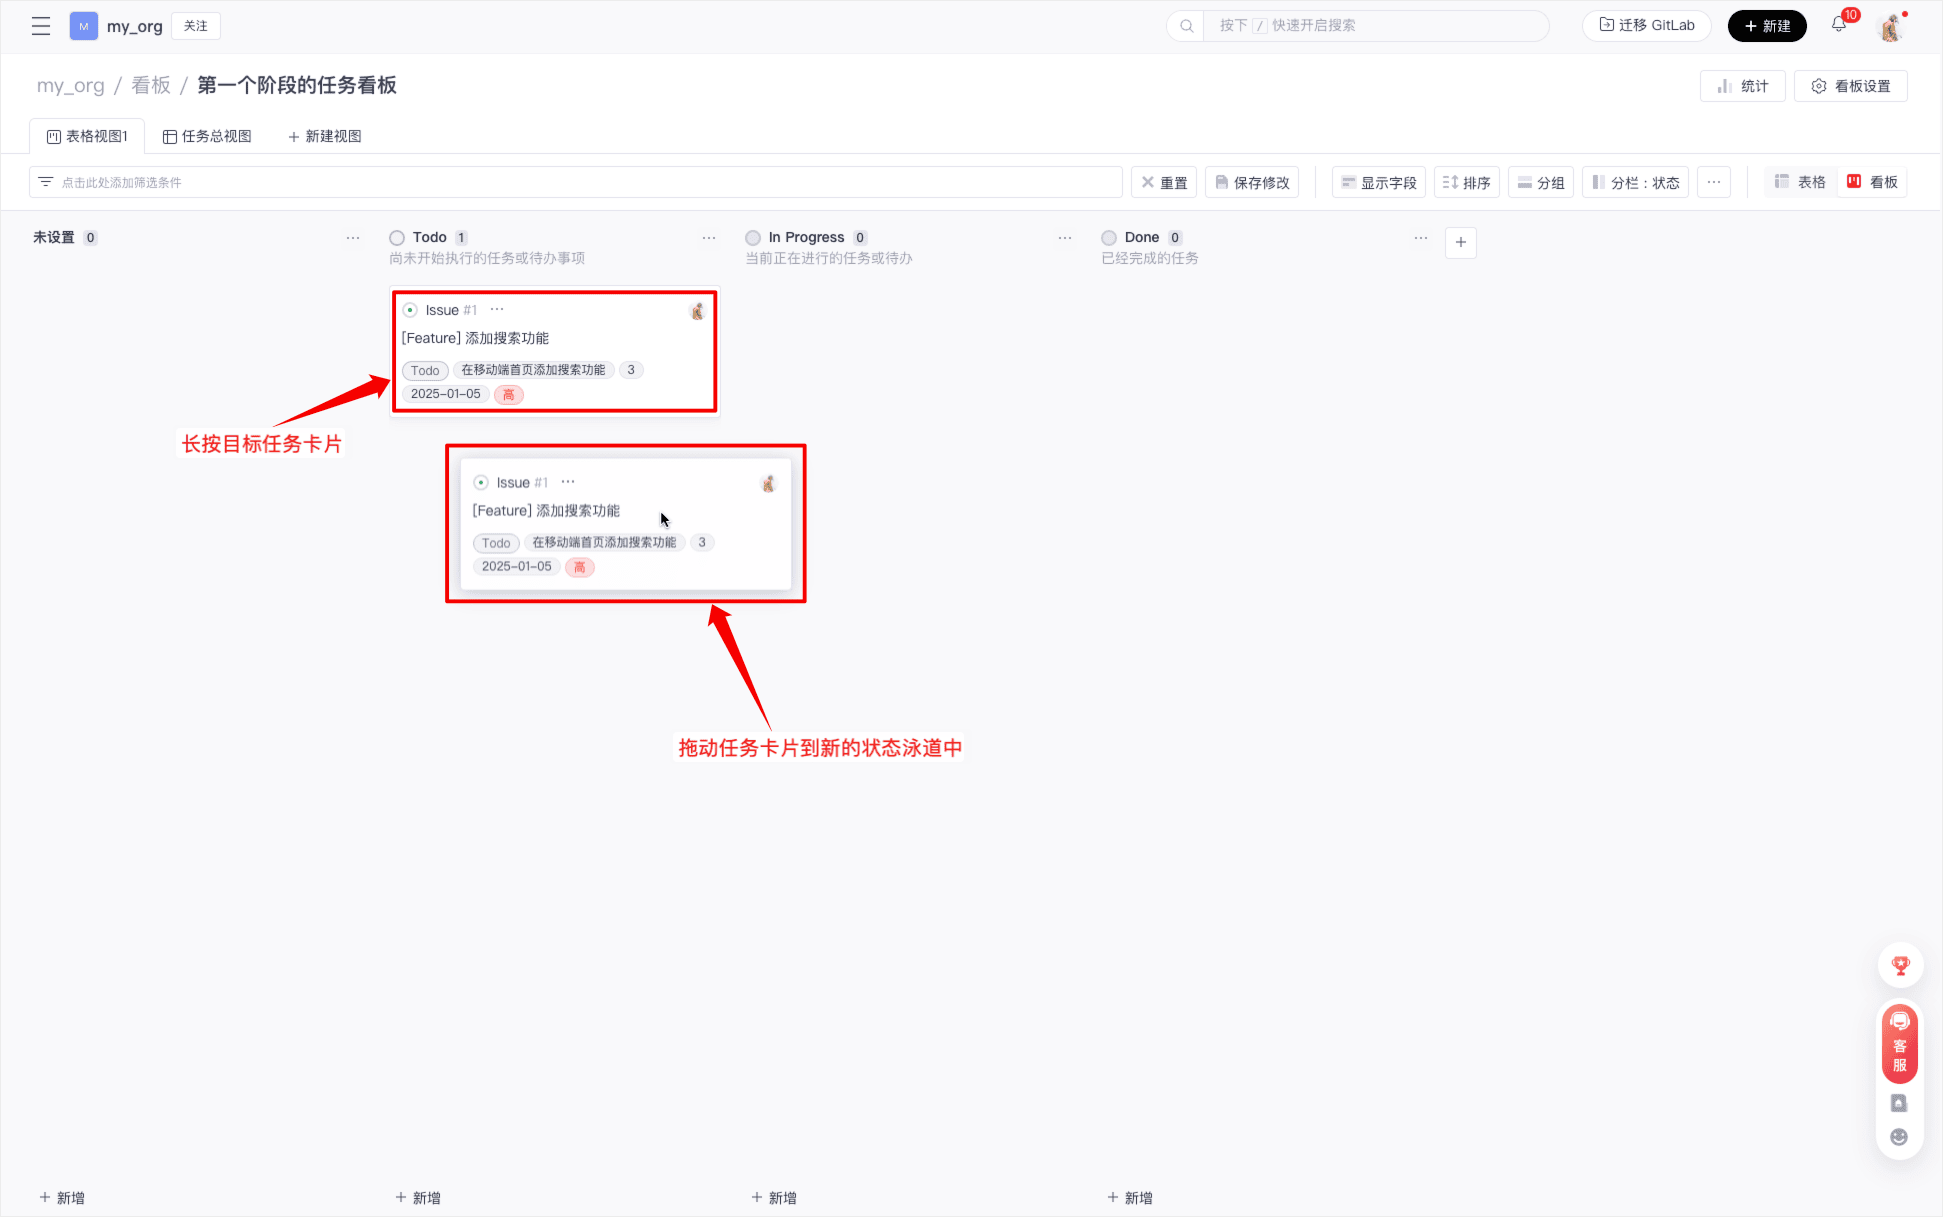
6. Modify Task Status
In Table View:
On the view page, find the target task, click on its status column, and select the new status from the drop-down menu
In Board View:
Find the target task card, drag the card to the target status lane, and release to update the status
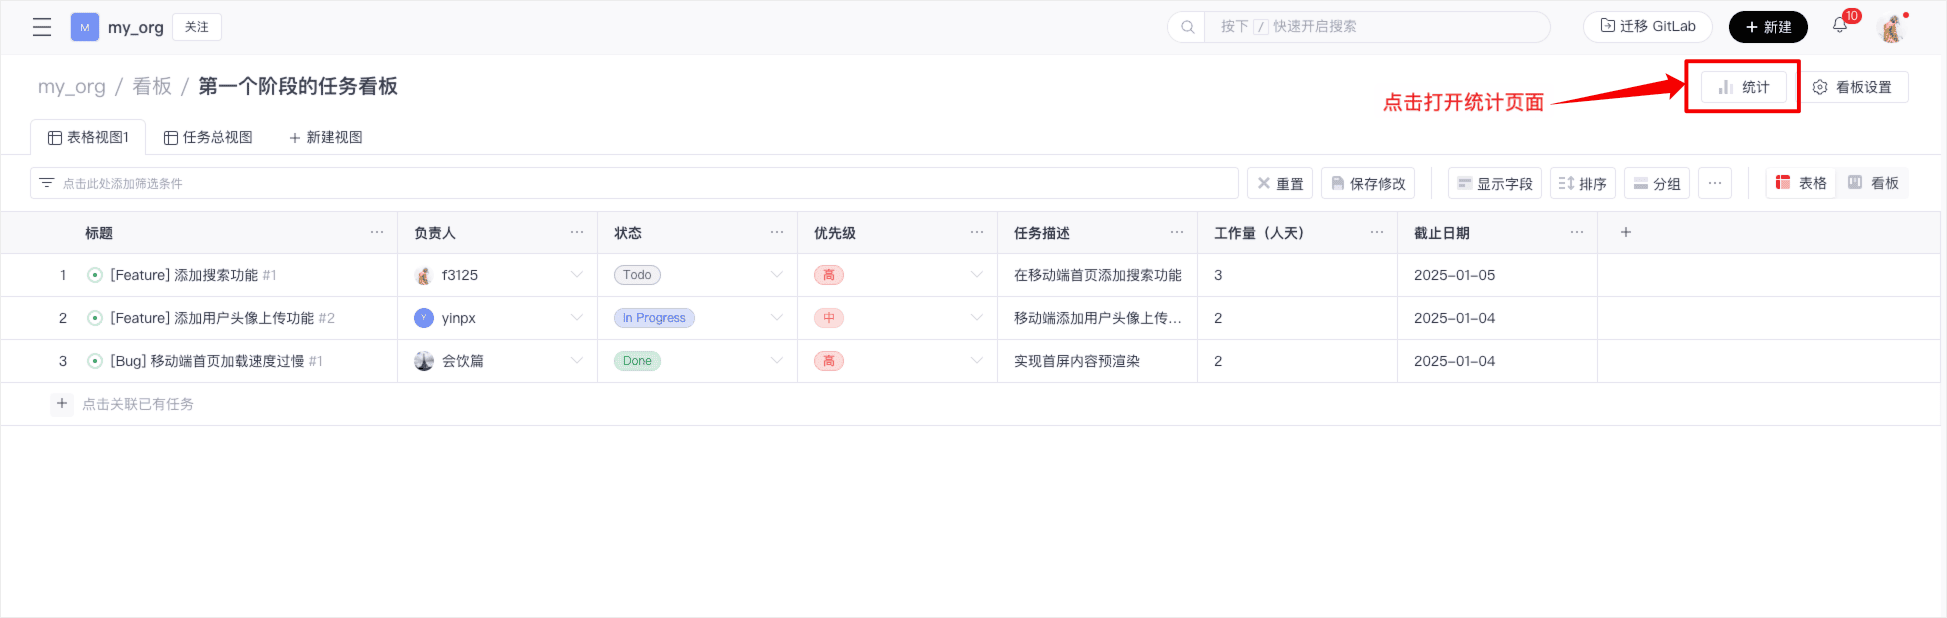
7. Board Statistics
-
Click the "Statistics" button at the top right corner of the view page to expand the statistics page
-
On the statistics page, you can create statistical charts, configure each chart's display (chart type, grouping method, X-axis, Y-axis). After configuring the chart, click "Save Chart" to persist the settings

Through the above steps, you can quickly create and set up a board, add views, customize fields, link tasks, and modify task statuses. The intuitive interface and flexible features of the board help teams collaborate efficiently and ensure clear visibility of project progress. Start using the board now and make your project management more organized!